Preserving the flavors of local fruits through homemade jams and preserves is a delightful way to enjoy the taste of summer all year long. Whether you have an abundance of fresh fruits from your garden or local farmers’ market, turning them into delicious spreads can be a rewarding and satisfying experience. With a few simple ingredients and some basic kitchen tools, you can create your own jars of flavorful preserves that will brighten up your breakfast table or make for thoughtful homemade gifts. In this article, we will guide you through the process of making homemade preserves from local fruits, from selecting the best fruits to the final jarring step.
Choosing the Best Fruits:
The first step in making homemade preserves is selecting the best fruits. Choose ripe, in-season fruits for the freshest and most flavorful results. Berries such as strawberries, raspberries, and blackberries are popular choices for preserves, as are stone fruits like peaches, plums, and apricots. Make sure the fruits are free from blemishes and bruises, as these can affect the overall quality of your preserves.
Preparing the Fruits:
Once you have chosen your fruits, wash them thoroughly and remove any stems, pits, or seeds. Depending on the type of fruit, you may need to peel and chop them into smaller pieces. For berries, simply rinse and drain them before using. The size of the fruit pieces can affect the texture of your preserves, so consider how chunky or smooth you want the final product to be.
Cooking the Preserves:
In a large, heavy-bottomed pot, combine the prepared fruits with sugar and lemon juice. The sugar helps to preserve the fruits and acts as a natural thickening agent, while the lemon juice adds a bright, tangy flavor to the preserves. Cook the mixture over medium heat, stirring occasionally, until the fruits have softened and the mixture has thickened to your desired consistency. This process can take anywhere from 20 to 45 minutes, depending on the fruits you are using and how thick you want the preserves to be.
Testing for Doneness:
To test if your preserves are ready, place a small amount on a chilled plate and run your finger through it. If the mixture holds its shape and wrinkles slightly, it is ready to be jarred. If it is still runny, continue cooking and testing until it reaches the desired consistency. Be mindful not to overcook the preserves, as they can become too thick once cooled.
Jarring the Preserves:
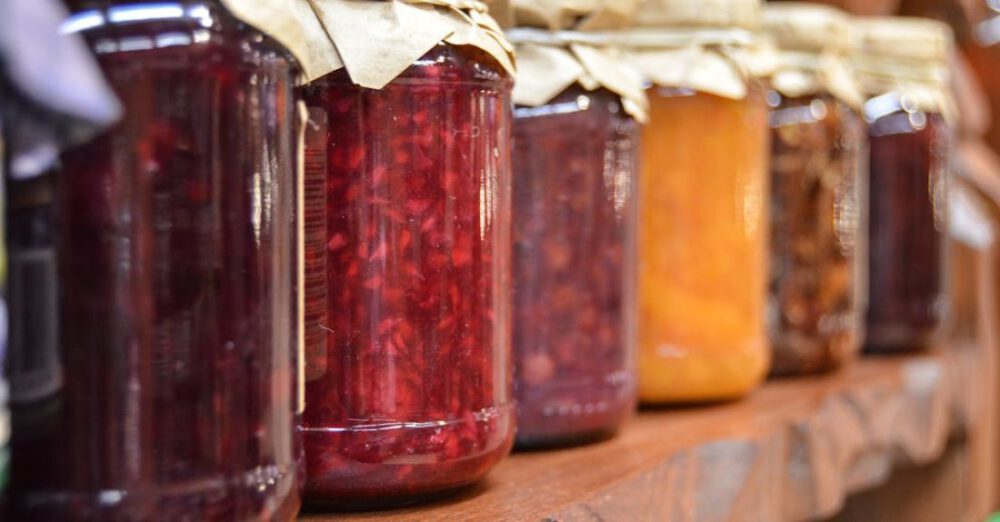
Once your preserves are ready, carefully ladle them into clean, sterilized jars, leaving a small amount of headspace at the top. Wipe the rims of the jars clean to ensure a proper seal, then secure the lids tightly. To further preserve the preserves, you can process the jars in a water bath canner for an airtight seal. Alternatively, store the jars in the refrigerator for immediate consumption.
Enjoying Your Homemade Preserves:
Once your preserves have cooled and set, they are ready to be enjoyed. Spread them on toast, swirl them into yogurt, or use them as a filling for cakes and pastries. Homemade preserves also make lovely gifts for friends and family, especially when paired with a freshly baked loaf of bread or a box of scones. Experiment with different fruit combinations and flavorings to create your own unique preserves that capture the essence of the season.
In conclusion, making homemade preserves from local fruits is a simple and rewarding way to preserve the flavors of summer. From selecting the best fruits to jarring the final product, the process of making preserves is a labor of love that results in delicious spreads that can be enjoyed throughout the year. So, roll up your sleeves, gather your favorite fruits, and embark on a culinary adventure that will fill your pantry with jars of sweetness and sunshine.